Publish a site with Astro
Choose how to publish an Ascribe project, and set up an Astro site that publishes it, with @ascribed/astro.
For AI agents: the documentation index is at llms.txt, and this page is available as Markdown.
@ascribed/astro publishes an Ascribe project as an Astro site. It runs ascribe build --emit site before Astro loads content, and gives you a content collection of the built pages, with a schema generated from ascribe.toml. It applies heading ids and image attributes in Astro’s own Markdown pipeline, so Astro’s table of contents and image processing still work, loads the element library, and serves the files pages link to. In astro dev, it rebuilds as you edit.
It supports Astro 7.3.5 and later 7.x releases.
This guide sets a site up, in an Astro project you have. The @ascribed/astro reference has its options, its components, and everything it does in astro build and astro dev.
Ways to publish
Ascribe checks and builds a project’s pages; a site generator publishes them. There are three ways to put them on the web, and one of them isn’t for a published site:
| Way | What it is | For a published site |
|---|---|---|
| Astro | @ascribed/astro, which this guide sets up |
Yes: everything Ascribe builds, published and tested together |
| Your own generator | Another generator that reads the site output, as the contracts say | Yes: what the contracts give, and the rest is yours to write |
ascribe preview |
Ascribe’s own HTML, on your computer | No |
Astro is the way Ascribe builds for and tests. The integration renders the pages, and publishes, from the same build, each page’s head, the sitemap and robots.txt, the outputs for agents, permalinks, every line of a versioned build, and a host’s files. Set up a site below, then deploy it.
Your own generator reads what ascribe build --emit site writes, which the contracts fix: each changes only by a decision recorded with the change, so a generator can rely on it as @ascribed/astro does.
- The pages are CommonMark with Ascribe’s elements. The site-render contract says how to render them, with
@ascribed/elementsfor their script and styles. - The output-layout contract says where each file is, the page records among them.
- The navigation contract gives the sidebar.
- A page’s address is the one the
astroprofile gives it, the only consumer profile there is, so the generator’s routes follow it.
What the integration does beyond rendering is the generator’s to do, from the same files: the head, sitemap, and robots.txt, the permalinks’ pages, and the outputs for agents, copied from the plain Markdown output ([consumer]).
ascribe preview renders the pages as HTML with a sidebar and search, to read them as a site without Astro (ascribe preview). It isn’t for a published site: it serves only the computer it runs on, renders a page with errors as far as it goes, and writes none of what a site tells search engines and agents. ascribe versions export renders the same HTML into a folder that needs nothing else, as an archive of a release line that’s leaving the live versions, and every page in it asks not to be listed.
Set up a site
These steps add Ascribe to an Astro project. examples/astro-site is a complete site built this way.
1. Install
npm
npm install @ascribed/astropnpm
pnpm add @ascribed/astroIt brings @ascribed/cli, the ascribe command for your platform, and @ascribed/elements. Astro’s image processing also needs sharp (npm install sharp) if your project doesn’t have it.
astro build and astro dev run the ascribe of the @ascribed/cli that @ascribed/astro depends on, which is always of the same version as @ascribed/astro (or the binary its binary option or the ASCRIBE_BIN environment variable names). The editor, CI, and npx ascribe run the project’s own, the one Getting started installs. Keep the two packages on the same version, and the package manager installs one @ascribed/cli that both run; with two versions, the site and the check can disagree about a page. Upgrade them together:
npm
npm install @ascribed/astro@latest
npm install --save-dev @ascribed/cli@latest
pnpm
pnpm add @ascribed/astro@latest
pnpm add --save-dev @ascribed/cli@latest
2. Write ascribe.toml
Put ascribe.toml in the Astro project’s root, beside astro.config.mjs. Its [consumer] settings are the site’s routing, because Ascribe writes every link. The integration gives Astro its site, base, and trailingSlash from them, so astro.config.mjs can leave all three out (a home page in front of the docs says how base can differ from base-path):
spec = "0.1"

[project]
content-root = "content"
output-dir = ".ascribe/build"

# The site's routing: `@ascribed/astro` gives Astro its `site` and
# `trailingSlash` from here, and checks that Astro's `base` is base-path or a
# path above it.
[consumer]
profile = "astro"
site = "https://docs.example.com"
base-path = "/docs/"
trailing-slash = "never"
The source pages go in content/. If your Ascribe project lives elsewhere, such as in a folder beside the site’s, set the integration’s project option to its folder (step 3). The ascribe.toml reference has everything else it can declare.
From Getting started
With the ascribe.toml from Getting started, keep your file, and your pages where they are: its content root stays docs, so where this guide says content/, read docs/. Its [consumer] already has site, and the defaults are an astro profile, the docs at the site’s root, and addresses that end in /. Add a line only for what you want otherwise, such as the two in the example above:
[consumer]
site = "https://docs.example.com"
base-path = "/docs/"        # add: the docs under /docs/, not at the site's root
trailing-slash = "never"    # add: addresses without a final /
Set base-path before the pages’ first commit if you can. Once a commit has them under another one, ascribe check reports that the change moved their addresses, as address-lost: see before the first deploy for what to do when nothing was published.
3. Add the integration
import { defineConfig } from "astro/config";
import ascribe from "@ascribed/astro";

// The integration gives Astro its `site`, `base`, and `trailingSlash` from
// ascribe.toml's [consumer]. Any of them set here must agree with it, or the
// integration fails the build.
export default defineConfig({
  integrations: [ascribe({ build: "site" })],
});
build names the build in ascribe.toml whose output the site shows. A project without [builds] has one, site.
4. Write the site’s files
A site needs a content collection of the built pages, a route for them, and a layout that loads the elements; this one has a sidebar and a stylesheet too. One command writes the four files, in the Astro project’s root:
npm
npx @ascribed/astro initpnpm
pnpm exec ascribe-astro initIt writes src/content.config.ts, src/pages/[...slug].astro, src/layouts/Docs.astro, and src/styles/docs.css, and from then on they’re yours to change; it never writes over a file, and if any of them is there, it writes nothing. With the Ascribe project elsewhere, say where with --project ../docs, and with several builds in ascribe.toml, say which the site shows with --build. The sections below say what each file does, as init writes them for the ascribe.toml above.
The collection
import { defineCollection } from "astro:content";
import { ascribeCollection } from "@ascribed/astro/content";
// Generated by `ascribe build --emit site`; the integration runs it first.
import { schema } from "../.ascribe/build/site/site/_ascribe/schema.ts";

export const collections = {
  docs: defineCollection(ascribeCollection({ schema })),
};
The schema’s path is <output-dir>/<build>/site/_ascribe/schema.ts, in the folder holding ascribe.toml. Importing it by path keeps its exact types, so entry.data is typed from your page types. If you change [project] output-dir, the build, or the integration’s project, change this line too.
If the Ascribe project is outside the Astro root (project: "../docs"), import the copy of the schema the integration writes inside it instead, .astro/integrations/_ascribed_astro/schema.ts, which is ../.astro/integrations/_ascribed_astro/schema.ts from src/content.config.ts, as init --project does. The schema imports astro/zod, which TypeScript can only find from inside the Astro project, so type-checking (astro check, tsc) fails on the original there; Astro’s own build works with either. The integration updates the copy after each build.
The route
A page’s URL is the base path plus its entry id, and the root page, content/index.md (entry id index), is at the base path itself. That’s what Ascribe’s links point to:
---
import { getCollection, render } from "astro:content";
import Docs from "../layouts/Docs.astro";

// A page's route is the base path plus its entry id, and the root page (id
// `index`) is at the base path itself: what Ascribe's router computes for
// every link it writes.
export async function getStaticPaths() {
  const entries = await getCollection("docs");
  return entries.map((entry) => ({
    params: { slug: entry.id === "index" ? undefined : entry.id },
    props: { entry },
  }));
}

const { entry } = Astro.props;
const { Content, headings } = await render(entry);
---

<Docs entry={entry} headings={headings}><Content /></Docs>
Entry ids are Astro’s own: Guides/My Setup.md is guides/my-setup. The route is at the root of src/pages/ because the base path is Astro’s base; with the docs under it, move the route to their folder (a home page in front of the docs).
The layout
A layout loads the element library, and shows the sidebar, the page’s availability, and its table of contents:
---
import { getCollection, type CollectionEntry } from "astro:content";
import type { ComponentProps } from "astro/types";
import Availability from "@ascribed/astro/Availability.astro";
import Elements from "@ascribed/astro/Elements.astro";
// Everything the head says about the page, from its record.
import Head from "@ascribed/astro/Head.astro";
// With a versioned build, the lines that have the page, and on an older line
// what it is and where the current one is.
import Versions from "@ascribed/astro/Versions.astro";
import VersionBanner from "@ascribed/astro/VersionBanner.astro";
import {
neighbors,
sidebar,
type Formatted,
type SidebarGroup,
type SidebarPage,
} from "@ascribed/astro/content";
// The layout's styles. To style the site your own way, change the file, or
// delete it and this line.
import "../styles/docs.css";
interface Props {
entry: CollectionEntry<"docs">;
headings: { depth: number; slug: string; text: string }[];
}
/**
* What the layout reads of a page's frontmatter: `title`, which every content
* type has, and what a type may have. `title` is plain text; `formatted.title`
* is the title as HTML, with its code spans as <code>, when the content model
* sets `inline = "code"` on `title`.
*/
interface Page {
title: string;
available?: ComponentProps<typeof Availability>["available"];
formatted?: { title?: string };
}
const { entry, headings } = Astro.props;
const page = (of: CollectionEntry<"docs">) => of.data as Page;
const escape = (text: string) =>
text.replaceAll("&", "&").replaceAll("<", "<").replaceAll(">", ">");
/** A page's title as HTML: its formatted form, or its plain text escaped. */
const titleHtml = (of: CollectionEntry<"docs">) =>
page(of).formatted?.title ?? escape(page(of).title);
/** A sidebar label as HTML: its formatted form, or its plain text escaped. */
const labelHtml = (of: { label: string; formatted?: Formatted }) =>
of.formatted?.label ?? escape(of.label);
const { available } = page(entry);
// The sidebar: the project's navigation, in ascribe.nav's order or the
// default one, each page with its address and label, and a nested section's
// pages right after its own page, each with its depth. With a versioned build,
// it shows the pages of the line this page is in. Previous and next are the
// pages before and after this one in the navigation's reading order.
//
// The default order puts a section's pages by content type, then title, so
// "Configure" comes before "Install". To choose another, write ascribe.nav
// beside ascribe.toml, or drag the pages in the editor: the docs' "Put your
// pages in order" says how.
const entries = await getCollection("docs");
const groups = sidebar(entries, { entry });
const { previous, next } = neighbors(entry, entries);
/** A sidebar page, with how many sections deep it is: 0 in a top section. */
interface Item {
page: SidebarPage<CollectionEntry<"docs">>;
depth: number;
}
/**
* A group's pages in order, each nested section's right after its own page,
* or after the group's pages when its own page is its `index.md`.
*/
function items(group: SidebarGroup<CollectionEntry<"docs">>, depth = 0): Item[] {
const placed = new Set<SidebarGroup<CollectionEntry<"docs">>>();
const out: Item[] = [];
for (const page of group.pages) {
out.push({ page, depth });
for (const section of group.sections) {
if (section.page?.entry !== page.entry) continue;
placed.add(section);
out.push(...items(section, depth + 1));
}
}
for (const section of group.sections) {
if (!placed.has(section)) out.push(...items(section, depth + 1));
}
return out;
}
---
<!doctype html>
<html lang="en">
<head>
<meta charset="utf-8" />
<meta name="viewport" content="width=device-width, initial-scale=1" />
<Head entry={entry} />
<Elements />
</head>
<body>
<details class="menu">
<summary>Menu</summary>
<nav aria-label="Docs">
{
groups.map((group) => (
<section>
<h2 set:html={labelHtml(group)} />
<ul>
{items(group).map(({ page: item, depth }) => (
<li data-depth={depth}>
<a
href={item.href}
aria-current={item.entry.id === entry.id ? "page" : undefined}
>
<Fragment set:html={labelHtml(item)} />
</a>
</li>
))}
</ul>
</section>
))
}
</nav>
</details>
<main>
<VersionBanner entry={entry} />
<h1 set:html={titleHtml(entry)} />
<Availability available={available} />
<Versions entry={entry} />
<div class="page">
{
headings.length > 0 && (
<nav aria-label="On this page">
<ul>
{headings.map((heading) => (
<li data-depth={heading.depth}>
<a href={`#${heading.slug}`}>{heading.text}</a>
</li>
))}
</ul>
</nav>
)
}
<article><slot /></article>
</div>
<nav aria-label="Previous and next">
{
previous && (
<a rel="prev" href={previous.href}>
Previous: <Fragment set:html={labelHtml(previous)} />
</a>
)
}
{
next && (
<a rel="next" href={next.href}>
Next: <Fragment set:html={labelHtml(next)} />
</a>
)
}
</nav>
</main>
</body>
</html><Elements /> loads the element library, and <Head entry={entry} /> writes the page’s head from its record. The layout is yours: replace any part of it with your own components; the table of contents is headings from render. The components lists what @ascribed/astro gives a layout, and what each entry’s data has for it.
The stylesheet
src/styles/docs.css, which the layout imports, gives it a readable column in the system’s font, and both color schemes, as the reader’s system is. It puts the sidebar beside the page on a wide screen and behind a Menu on a phone, and the table of contents beside the page where there’s room and above it where there isn’t. Its colors and spaces are the element library’s --ascribe-* properties, so setting one restyles the layout and the elements together (Element library reference); the page’s background and text are the browser’s own light or dark.
It’s a starting point, not a theme: change it as you like. To style the site from scratch, delete the file and its import line in the layout; the layout’s markup reads in order without it.
The sidebar
The layout draws the sidebar from the project’s navigation, with sidebar(), and the links at the page’s foot with neighbors(), so the site keeps no list of its own. It lists a nested section’s pages in their top section’s group, each <li> with a data-depth for your stylesheet to indent:
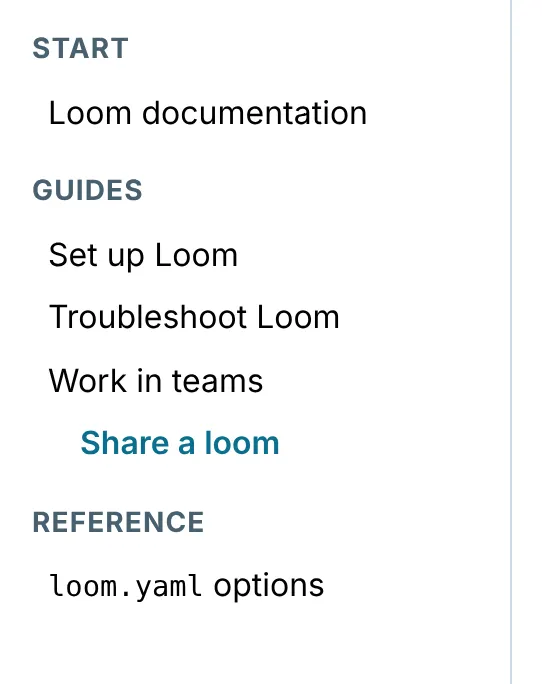
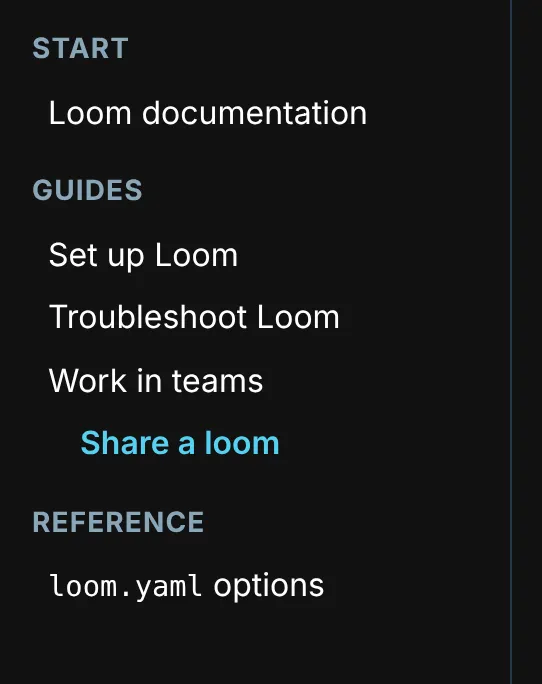
To change the order or a label, write ascribe.nav, or drag the pages in the editor: Put your pages in order.
5. Build
npx astro dev     # rebuilds as you edit
npx astro build
astro dev prints the address it serves, such as http://localhost:4321/. Open it with your base-path after it, http://localhost:4321/docs/ for the ascribe.toml above, and the site is there. astro build writes it to dist/, for your host: Deploy the site publishes it from CI.
See also
- Deploy the site: building the site in CI and publishing it on GitHub Pages or Netlify, and what each host needs.
- Put the docs in a site with more than the docs: a home page of your own at
/, with the docs at/docs/. - Publish for AI agents:
llms.txtand each page’s Markdown, with the site. - Serve the Markdown versions: what your host does for agents.
- The
@ascribed/astroreference: the options, the components, and everything the integration does inastro buildandastro dev, with versions and permalinks. - Element library reference: styling the elements.